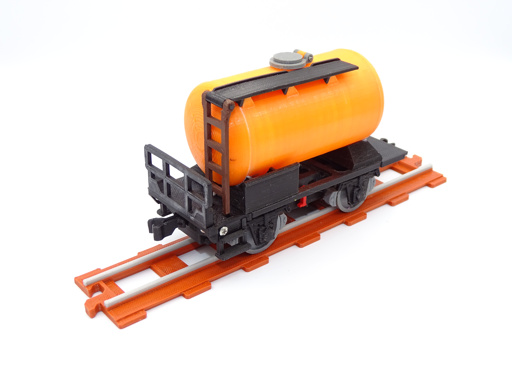
Cistern wagon - Assembly manual
Needed parts or materials (suggested, you can use other matches parts)
- 22 pieces M2.2x6.5 screw (DIN7981),
- several short pieces of filament 1.75 mm for hinges,
- cyanoacrylate glue (not essential but may be needed to glue the wheels to the axles and gluing the tank).
Wagon load
- You can pour water into the wagon (if you have previously glued and sealed the cistern-tank.stl and cistern-tank-bottom-partition.stl elements). Gluing can be done with cyanoacrylate glue or, for example, weld the elements with a 3D pen. The walls of the tanker are profiled in such a way that to pour out all the water it is enough to turn the tanker upside down. Do not fill tanks with other fluids.
- IMPORTANT NOTE! If the cisterns are filled with water, the playing should be supervised by adults. The cisterns do not have a leakproof cap, so in the event of a wagon overturning, water may leak out and cause damage to the carpets or floor panels.
3D printing
- We recommend using PLA filament, nozzle 0.4 mm and layer height 0.2 mm, but you can test other settings.
- All files are in print-ready positions, you don't have to rotate it on your slicer.
- The elements are easy to print and do not require the use of supports, brims or rafts (the only exception is axle.stl, which prints vertically, and for this we recommend a small brim).
- Print all elements with 100% filling (the wagon runs better if it is a little heavier, the differences in time and filament consumption when printing with a small filling are not significant).
Assembling of parts
- The sizes of the wheels and axles should match, but if they are too loose, try to stick them with glue. You can also slightly chamfer the ends of the axle with a regular sharpener.
If the axle is too thick, you can gently sand the hole in the wheel or you can very gently change the scale of the axle.stl file when cutting in a slicer (change the scale of the element only for horizontal, the vertical scale should remain at 1:1). We have designed a special wheel and axle assembly tool, you can print it and use it to make your work easier.
- If the handbrake lever gets stuck frequently, you can sand the surface it is in contact with. In addition, you can shorten the lever element a little where it contacts the brakes.
- After gluing the tank with cyanoacrylate glue, leave the tank to evaporate (glue vapors can stain the surface). You can use any other seal instead of glue.
- Use pieces of filament 1.75 mm to attach hatch and ladder.
Maintenance
The axles of locomotives and wagons are plastic, so after long-term use, the vehicles may experience greater resistance and may creak while driving. To extend the time of trouble-free operation, we recommend lightly lubricating the axle with Teflon grease.
Backward compatibility
On June 26, 2022, due to the adaptation of trains to run on rails, the method of mounting couplers was changed. If you have models downloaded before this date, you can print and install the new version of the coupler-automatic.stl and coupler-automatic-cotter.stl files should be printed and installed in older wagons. (files are available in the free locomotive model). You can also turn all couplers on older cars upside down, but this is not recommended - trains running on the tracks will not fit well into the turns.
Assembly manual movie
Click to see assembly manual on Youtube.
You can pause the movie and skip frames using "<" and ">" buttons from your keyboard.

