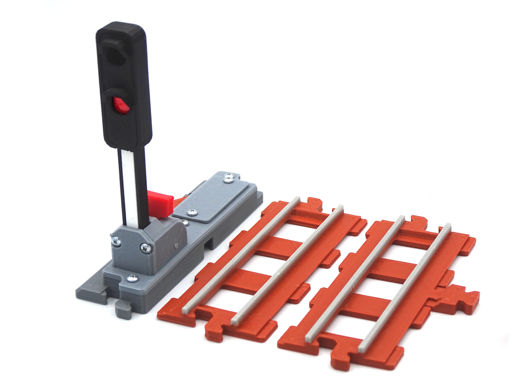
Railway light signal
stl files to print on your own 3d printer
stl files: 19 , parts to print: 19

Self-switching model of a railway light signal.
Railway light signal - Assembly manual
Needed parts or materials (suggested, you can use other matches parts)
- 7 pieces M2.2x6.5 screw (DIN7981).
Printing
- We recommend using PLA filament, a 0.4 mm nozzle, and a 0.2 mm layer height, but feel free to test other settings as well.
- All parts are positioned ready for printing, so you don’t need to rotate them in your slicer.
- The parts are easy to print and do not require supports, brims, or rafts.
- Print all parts with 100% infill, but if you’d like, you can also try other settings.
- If parts don’t fit on your printer bed, try rotating them diagonally. This can help especially with longer elements.
Assembly
- The signal-slider.stl part needs to be painted in three colors. Oil-based markers work best, but you can try other techniques as well. It's important that the painted part can move freely up and down the structure.
- To make assembly easier, the tools folder contains a file called assembly-tool.stl. This is a tool that helps hold parts in place while screwing together the signal housing.
Part fitting and testing
- The signal is designed so that even prints of lower quality should not significantly affect its functionality.
- If the signal doesn’t lock into place after assembly, check the interaction between signal-sensor.stl and sensor-slider.stl. When the green light is on, sensor-slider.stl should rest on signal-sensor.stl and lock into place.
- If the signal suddenly stops turning off, the issue might be with the sensor-spring.stl spring. In that case, replace it with a new one.
- You can secure the axis holding the switch lever to prevent it from slipping out by gluing it in place.
Two-color track printing
- If your printer supports filament changes during printing, you can make the rails in a different color.
- The height at which you should change the filament is 4.1 mm or higher.
- In your slicer, check which layer contains only the rails. If your printer supports the M600 command, you can insert it into the gcode after that layer.
- Remember or note down the layer number where you want to change the filament color! It’ll be useful for printing all tracks.
Track connection fitting
- The model is protected against "elephant’s foot", but this is still the most common issue affecting proper track connections. To avoid problems, first try properly leveling your print bed.
- If the track joints don’t fit well, try gently filing them with a file or trimming the connection edges with a small knife.
Assembly manual movie
Click to see assembly manual on Youtube.
You can pause the movie and skip frames using "<" and ">" buttons from your keyboard.
License
This model is free to use.
You can:
- print an unlimited number of models,
- modify and print modified files,
- print models for a gift,
- use printed models for free education.
You can not:
- use models for earn money,
- sell printed models,
- sell any stl files (original or modified),
- publish or distribute any stl files.
